- You can find all the options you need on the “Insert” tab, in the table tools and in the “Picture Format” tools.
- We recommend using the format “In Line with Text” for pictures.
- Use automatic captions for your tables and pictures by right-clicking on your items and choosing “Insert Caption”.
How do you create a table?
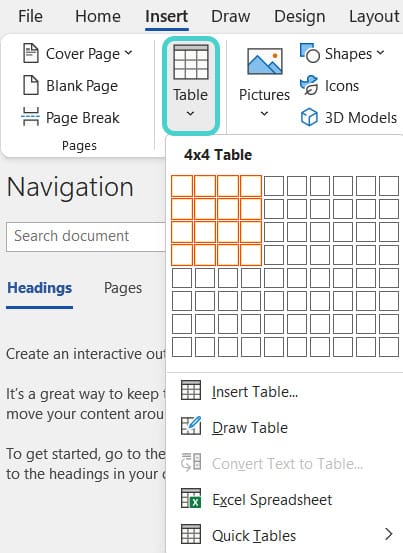
You can easily create tables by clicking the “Table” button on the “Insert” tab. By selecting the displayed boxes with the mouse, you determine how many columns (vertical) and rows (horizontal) the table should have, e.g. 4×4 columns and rows in our screenshot.
You can find advanced options in the “Insert Table” pop-up window.
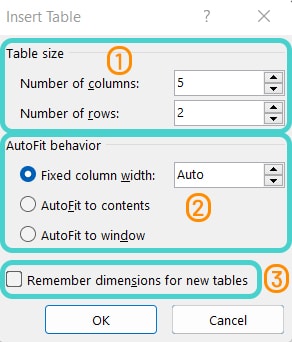
Here, you can set the number of columns and rows (1), fix column width or adjust the columns automatically (2),and save these settings as a template for new tables (3). You can also choose to use one of the quick tables or draw a table.
Change the details of an already created table in the “Table Properties” window. To do this, right-click on the table and choose “Table Properties” from the context menu.
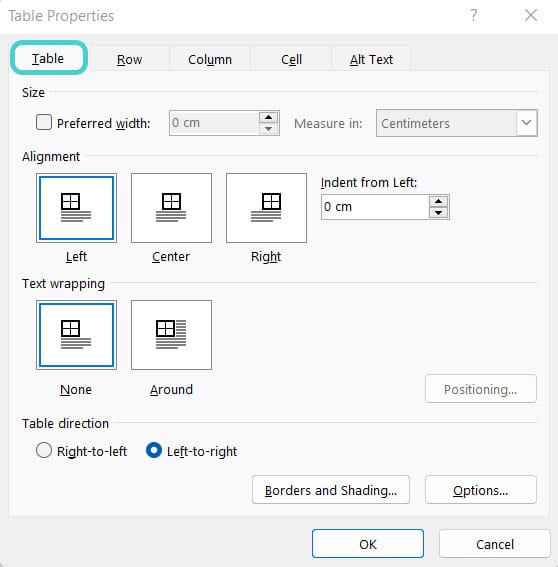
In the “Table” tab, you can change the properties of entire tables, while the “Row”, “Column” and “Cell” setting tabs edit these elements only.
As soon as you select a table in Word, the table tools are automatically displayed. You can also adjust the table properties there.


How do you insert pictures and graphics in your document?
Pictures that are composed of text boxes or similar get messy very easily. The best thing to do is to create your pictures in a separate file (or another program) and paste them as a single picture.
If a program doesn’t give you the option to export pictures, it’s usually easiest to take a screenshot. The snipping tool that comes with Windows does the job well enough if you don’t want to install another program for screenshots. It also has the advantage that screenshots can be inserted into Word directly afterwards with the shortcut CTRL+V.
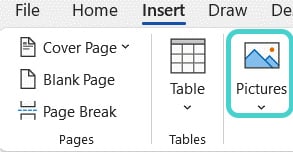
To insert a picture, click the “Pictures” button on the “Insert” tab and then select the file you want to insert.
The selected picture is inserted at the position of the cursor with the formatting “In Line with Text” and is automatically scaled to page width. If this is too large for you, you can also adjust the size and position using the “Picture Format” tools that are automatically displayed on the menu or by right-clicking the picture.

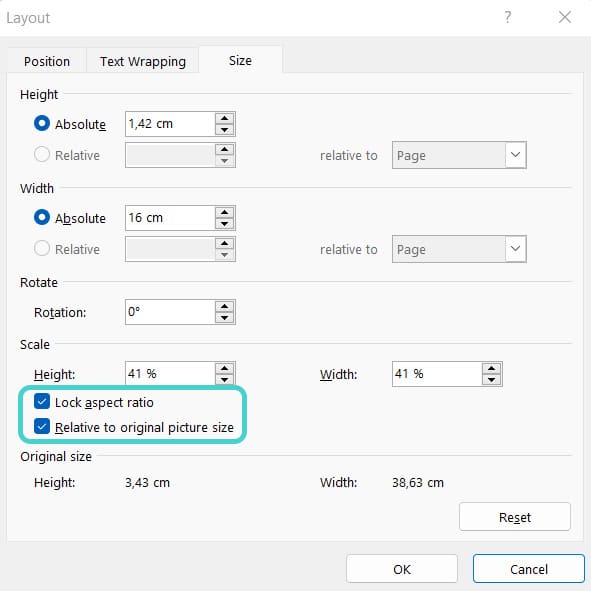
To avoid distorting a picture, you should always keep the options “Lock aspect ratio” and “Relative to original picture size” selected. These can be found by right-clicking the picture and selecting “Size and Position”.
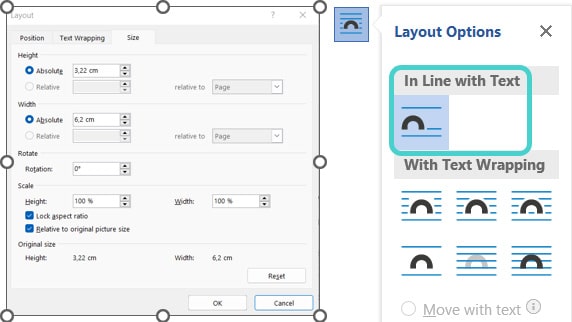
To keep your image in the same place in the text where you positioned it, we also recommend positioning it between two paragraphs and using the option “In Line with Text” in the layout options. Just left-click on your picture, the symbol will automatically appear.
How do you insert shapes and SmartArt in your document?
On the “Insert” tab, in addition to the objects already described, there’s also the option of inserting shapes and SmartArt.
Shapes is the collective term for lines, block arrows, rectangles and other objects that can be inserted individually and form the building blocks for SmartArt.
Using the SmartArt button, you can insert several shapes that are already linked together and are suitable for graphically representing processes or relationships, for example.

How do you use automatic captions for tables, images, and other objects?
Right-click on the object and select “Insert Caption” from the context menu to automatically insert a caption and number the various figures, tables, and diagrams in your work.
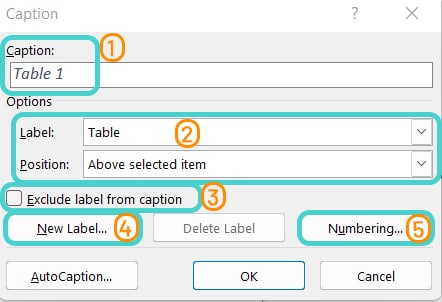
In the window below, you can see the preview of what the caption will look like (1). In the “Options” field you can choose one of the existing labels and define the position of the label (2). If you select “Exclude label from caption” (3), the caption won’t contain a caption like “Table”, but only the number of the object. You can also define a new caption if need be (4).
You should use the same label in your text for all elements of a category, e.g. “Figure” for all pictures, and not alternate between image, figure and picture. Otherwise, you won’t be able to create an automatic list of figures later. The “Numbering” button (5) takes you to another window where you can select the numbering of this specific label.
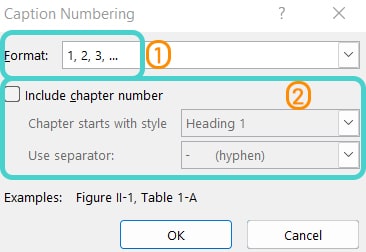
Besides the format (1) you can also define that the chapter number is included and which separator you want to use (2).
The numbering is defined for all captions of a specific type in the document and cannot be changed section by section – either all figure captions include the chapter heading or none. By default, the layout of the caption is set uniformly for all captions by the “Caption” style.
- Don’t forget to screenshot images that consist of multiple components. Otherwise, the picture might get messy.
- Don’t change the ratio of your images when resizing. Keep the options “Lock aspect ratio” and “Relative to original picture size” enabled.
- Don’t use different labels for your pictures. Stick to one label per type.
Test yourself: Do you know how to use tables, pictures and captions in Microsoft Word?
What is the fastest way to navigate to the table properties of your table?
- By resizing the table repeatedly
- By right-clicking the table and selecting “Table Properties”
- That’s a big secret
Solution:
B – By right-clicking the table and selecting “Table Properties”.
How can you resize your picture?
- By dragging it bigger or smaller or in the “Picture Format” tools
- By pushing a glass of water off my desk
- By blowing gently on the monitor
Solution:
A – By dragging it bigger or smaller or in the “Picture Format” tools.
How do you navigate to the “Layout Options” of your picture?
- By typing the word “layout” into the search box
- You need to install an add-on first
- By left-clicking on the picture
Solution:
C – By left-clicking on the picture.
What is SmartArt?
- A combination of different shapes that are grouped together
- A particularly clever way to include an image
- A talking painting
Solution:
A – A combination of different shapes that are grouped together.
Which layout option do we recommend for pictures?
- In Line with Text
- Off with the Head
- On the Road Again
Solution:
A – In Line with Text.