
- You can find all the options you need in the “Paragraph” section on the “Home” tab.
- Use the “Tab” key for indenting your list entries and the “Enter” key for adding more list entries.
- Always use automatic numbers for your headings.
How do you work with bulleted lists?
Bulleted and numbered lists are an important way to organize content but sometimes they can be stubborn. We’ll show you how to properly define list items, so you can work with without much effort.
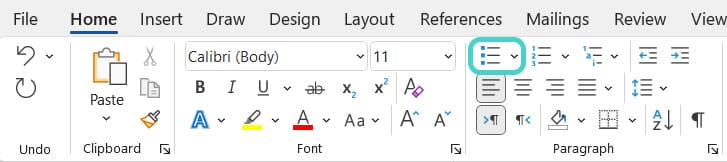
Unnumbered lists are the easiest lists to create. First, write down your list items one by one on separate lines – each separated by a paragraph. Then mark the entire list and choose a list format on the “Home” tab in the “Paragraph” section. On the far left you’ll find the “Bullets”.
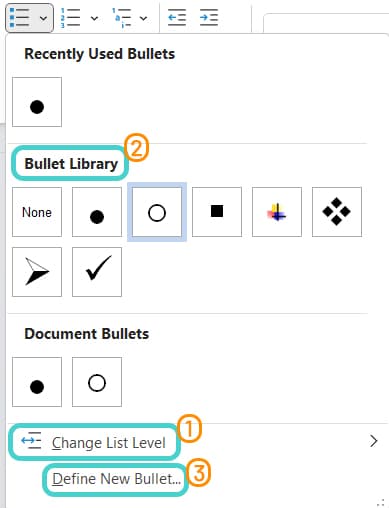
Your text is now a list of simple bullet points. Click on the small arrow to the right of the icon to select the bullet type you prefer.
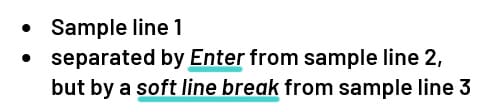
You can add more list entries at any time by pressing the “Enter” key. If you want to continue your list entries in a new line without creating a new bullet, you need a soft line break (on Windows devices with the shortcut “Shift + Enter”). Here’s the difference:
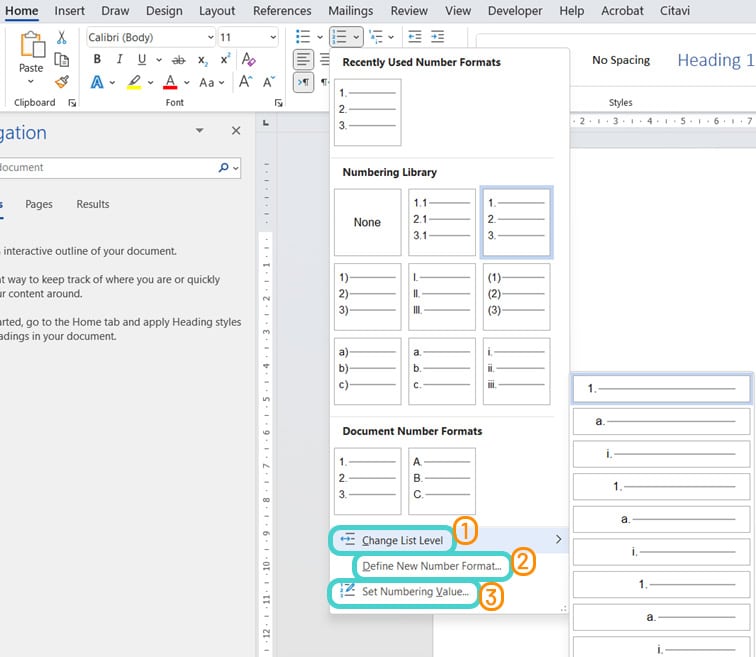
Create a subitem within a list by pressing the “Tab” key to indent it. You can also define the level for the marked entry in the list menu under “Change List Level” (1). If you want to change the symbol for the subitems, just mark your entry, go to the list menu and choose your preferred symbol (2). Here, you can also define new bullets (3) if you want to use other symbols like @ or #, for example, but don’t overdo it by choosing different bullet types for each point.
How do you work with numbered lists?
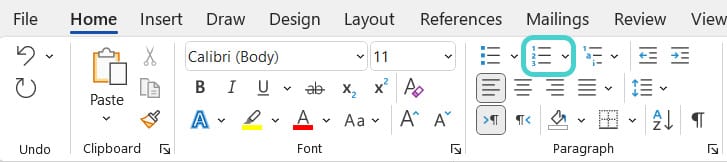
Follow the same steps for numbered lists. A simple click on the “Numbering” button adds numbers to your list entries in the format 1., 2., 3. and so on.
As with the bullets, you can choose from several templates, change the list level (1), define your own number format (2), or set the numbering value (3) if your list should ever not start with “1.” or “a)”. If you need a list with multiple levels, pressing the “Tab” key will not only indent each entry, but also automatically lower it by one list level. But please don’t overdo the levels! In most cases, 2 to 3 levels are enough.
The “Multilevel List” button in general works the same way. Unlike the bulleted and numbered list, however, here you are always immediately prompted to select a formatting for your list. You can choose the standard formatting first and then adjust it by right-clicking on the numbering and choosing “Adjust List Indents”.
The “Define new Multilevel list” window will open. If you click on “More” in the bottom left, you’ll get to the full view.
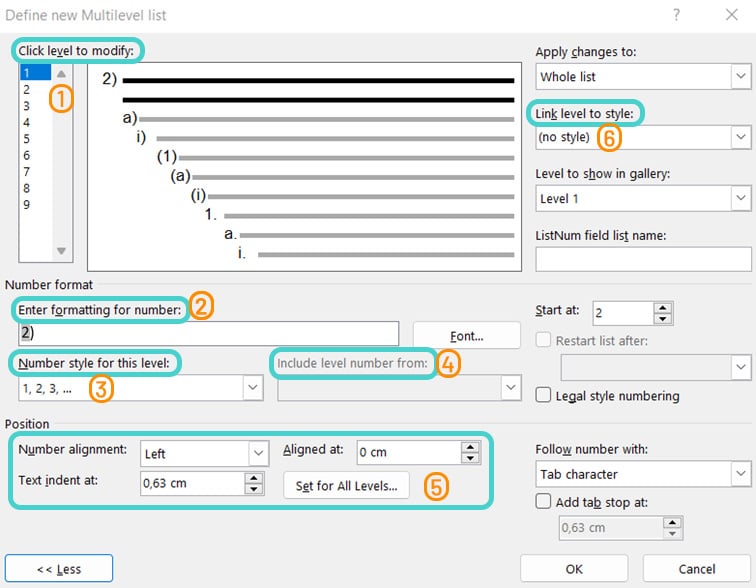
Here you can:
- Select the list level you want to change.
- Change the formatting for the selected list level, for example, to write “Chapter” in front of the number.
- Choose a number style such as “1,2,3” or “a,b,c” for the level; alternating numbers, letters and symbols if desired.
- Define if the numbering should include the previous level number.
- Use the options in the “Position” area to define the layout of the numbering.
- Link a list level with a style – this is especially useful for headings.
Click “OK” to confirm the changes. You’ll find your new-defined multilevel list in your list menu under “Lists in Current Document” and you can recall it with one click the next time you need it. This way, you get a consistent look for all the lists in your papers with a single, clean formatting.
How do you automatically add numbers to your headings in multilevel lists?
- Define a new multilevel list.
- Link the first level with the style “Heading 1”, the second level with “Heading 2” and so on.
- Apply your adjustments directly in this menu and save it.
- For individual headings that shouldn’t have any numbers (for example, an abstract or a glossary), you can simply delete the inserted numbers afterwards – the numbers of the other headings will automatically change.
- Don’t use too many different symbols for your lists and make sure they are consistent!
- Don’t use more than three levels!
- Don’t worry about lists 😉
Test yourself: Do you know how to use automatic lists in Microsoft Word?
Where do you find all the settings you need for lists?
- On the secret tab which no one has ever seen before
- On the “Home” tab
- Just drink tea, you don’t need tabs
Solution:
B – On the “Home” tab.
What happens when you press “Enter” whilst editing your list?
- A new list entry is created
- A grain of sand is blown away in the desert
- Your laptop’s keyboard backlight turns on
Solution:
A – A new list entry is created.
How can you change your bullet symbols or number format?
- By choosing the preferred symbol or format in the list menu
- By drawing them by hand
- By falling asleep on your keyboard
Solution:
A – By choosing the preferred symbol or format in the list menu.
What does the “Tab” key do?
- It closes all your windows
- It creates 42 unicorns
- It indents your list entry and lowers it by one list level
Solution:
C – It indents your list entry and lowers it by one list level.
Where can you set automatic numbers for your headings?
- In your mailbox
- In the multilevel list settings
- In a separate Excel sheet
Solution:
B – In the multilevel list settings.